More Related Content
Similar to Lose Your Excuse Facts
Similar to Lose Your Excuse Facts (20)
More from crysatal16 (20)
Lose Your Excuse Facts
- 1. Side 1 of 5
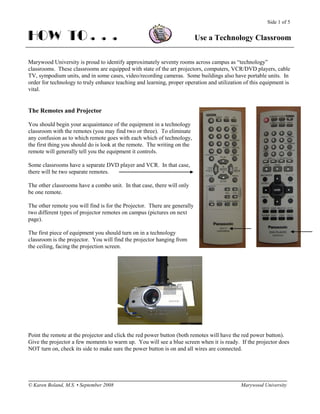
HOW TO . . . Use a Technology Classroom
Marywood University is proud to identify approximately seventy rooms across campus as “technology”
classrooms. These classrooms are equipped with state of the art projectors, computers, VCR/DVD players, cable
TV, sympodium units, and in some cases, video/recording cameras. Some buildings also have portable units. In
order for technology to truly enhance teaching and learning, proper operation and utilization of this equipment is
vital.
The Remotes and Projector
You should begin your acquaintance of the equipment in a technology
classroom with the remotes (you may find two or three). To eliminate
any confusion as to which remote goes with each which of technology,
the first thing you should do is look at the remote. The writing on the
remote will generally tell you the equipment it controls.
Some classrooms have a separate DVD player and VCR. In that case,
there will be two separate remotes.
The other classrooms have a combo unit. In that case, there will only
be one remote.
The other remote you will find is for the Projector. There are generally
two different types of projector remotes on campus (pictures on next
page).
The first piece of equipment you should turn on in a technology
classroom is the projector. You will find the projector hanging from
the ceiling, facing the projection screen.
Point the remote at the projector and click the red power button (both remotes will have the red power button).
Give the projector a few moments to warm up. You will see a blue screen when it is ready. If the projector does
NOT turn on, check its side to make sure the power button is on and all wires are connected.
© Karen Boland, M.S. • September 2008 Marywood University
- 2. Side 2 of 5
HOW TO . . . Use a Technology Classroom
The first type of remote has an RGB and VIDEO button below the red power button.. If you want to project the
computer, choose RBG. To project the DVD and/or VCR, choose VIDEO (Video will appear on the screen). If
your classroom also has a document camera and you want to project its contents, press VIDEO twice (S-Video
will appear on the screen).
The second type of remote does NOT have an RGB button but instead a PC1 and PC2 button. Both of these
buttons project a computer (PC1 is for the “house” computer and PC2 is for a laptop hookup). You will also see
VIDEO and S-VIDEO.
© Karen Boland, M.S. • September 2008 Marywood University
- 3. Side 3 of 5
HOW TO . . . Use a Technology Classroom
The Amplifier
The amplifier allows you to use sound. Turn it on by pressing the power button. There is a Master volume
button as well as one for each piece of equipment. The computer volume button is Input 1. Input 2 and Input 3 is
for the VCR and/or DVD.
The Computer
Turn on the computer by pressing the power button on the unit/tower. Make sure the monitor button is also in the
on position. Pull out the tray where you will find the keyboard and mouse. You will find USB ports in the front
of the unit/tower as well as the CD drive/drawer if you need to use them.
All are similar to your office computer and loaded with the most common supported software. Files can only be
saved into the My Documents folder. A loaded security package deletes any downloaded or saved files after a
reboot.
© Karen Boland, M.S. • September 2008 Marywood University
- 4. Side 4 of 5
HOW TO . . . Use a Technology Classroom
The DVD Player and VCR
You will find a separate DVD player and VCR or a combo unit in each technology classroom. To use them turn
on the power buttons. You may also use the corresponding remotes to operate them.
Many classrooms have a combo unit. You can play either a DVD or videotape in the same machine.
Remember to switch the projector remote from RGB to Video!
Laptop Connections
You can also project from a laptop in a technology classroom. Locate the cord (you
should find it near the monitor) and connect it to your laptop.
If you are using the second type of remote (the smaller one which contains PC1 and PC2
buttons), choose PC2 to project the laptop.
If you are using the first type of remote that contains only the RGB and VIDEO buttons, locate the switcher.
Press Mode 2. It normally is set on Mode 1 for the “home” computer.
Don’t forget to switch the remote to RGB!
© Karen Boland, M.S. • September 2008 Marywood University
- 5. Side 5 of 5
HOW TO . . . Use a Technology Classroom
Sympodium
You may find the computer monitor in your classroom replaced by a Sympodium. Sympodium enables you to
control any presentation and bring it to life – all you have to do is use the interactive pen. Write over slides in
digital ink, save your notes, access any website or multimedia file and project your work onto a large screen to
give your audience a truly interactive experience.
You do not have to use the Sympodium if you find it in your classroom but we encourage you to do so,
particularly if just for pointing out and circling information. Blue, Black and Red Pen buttons on the top of the
monitor will allow you to do this by simply pressing the corresponding button. Press the Arrow button to return
to “normal.”
Powering Off
PLEASE TURN OFF ALL EQUIPMENT WHEN FINISHED!!!
Remove all media (CDs, DVDs, flash drives, etc.) and then turn off the power buttons on the Amplifier,
Document Camera, DVD and/or VCR.
Shut down the computer (Start | Shut Down).
And most importantly, turn off the projector. Aim the remote at the projector and press the red power button
twice.
© Karen Boland, M.S. • September 2008 Marywood University