Oppenheimer Film Discussion for Philosophy and Film
Google forms tutorial for beginners
1. Google Forms Tutorial for Beginners
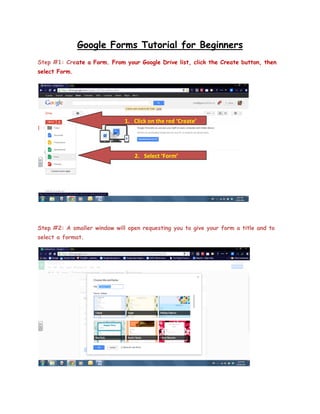
Step #1: Create a Form. From your Google Drive list, click the Create button, then
select Form.
1. Click on the red ‘Create’
2. Select ‘Form’
Step #2: A smaller window will open requesting you to give your form a title and to
select a format.
2. Step #3: Add questions by clicking the ‘Add item’ button.
Click ‘Add Item’.
Step #4: Select a question type.
Select a question type.
3. Step #5: Add section headers by clicking the down arrow next to the ‘Add item’
button and selecting ‘Section header’. Enter the section header and a description.
Click ‘Add item’ arrow & select ‘Section header’.
Step #6: Additional Features of Google Forms
1.
Reordering questions: To move a question to an alternate location within a form, hover the
cursor over the question to be moved. The question to be moved will display a light blue bar
across it. Left click, hold & drag the question to the appropriate location.
Left click, hold & drag the question.
4. 2. Editing features: Hovering over the question, prompts 3 icons to appear in the top right
hand corner of the highlighted blue bar. There are in order from left to right: ‘Edit’,
‘Duplicate’ & ‘Delete’.
‘Edit’, ‘Duplicate’ & ‘Delete’.
Step #7: Make the form available to students or recipients by clicking the blue ‘Send
form’ button located in the top right hand corner of the window.
5. There are many share options to choose from. We will focus on two:
1.
Email the form by entering in email addresses.
2. Post the link to the form.
Copy and paste.
6. Step #8: View responses by clicking the ‘View Responses’ button.
Step #9: When the time for submitting forms is over, stop accepting responses by
clicking the ‘Accepting responses’ button.
7. Step #10: View the document as a recipient would by clicking the ‘View live form’
button.