How to protect your videos
•Download as DOCX, PDF•
0 likes•107 views

This post is written about the way to add watermark to videos. I will tell you the way to protect our videos by adding logos to our videos.

Recommended
Recommended
More Related Content
Recently uploaded
Recently uploaded (20)
Featured
Featured (20)
How to protect your videos
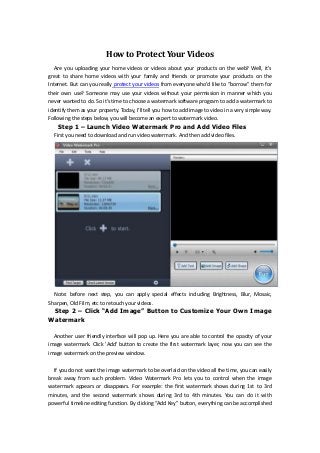
- 1. How to Protect Your Videos Are you uploading your home videos or videos about your products on the web? Well, it’s great to share home videos with your family and friends or promote your products on the Internet. But can you really protect your videos from everyone who’d like to “borrow” them for their own use? Someone may use your videos without your permission in manner which you never wanted to do. So it’s time to choose a watermark software program to add a watermark to identify them as your property. Today, I’ll tell you how to add image to video in a very simple way. Following the steps below, you will become an expert to watermark video. Step 1 – Launch Video Watermark Pro and Add Video Files First you need to download and run video watermark. And then add video files. Note: before next step, you can apply special effects including Brightness, Blur, Mosaic, Sharpen, Old Film, etc to retouch your videos. Step 2 – Click “Add Image” Button to Customize Your Own Image Watermark Another user friendly interface will pop up. Here you are able to control the opacity of your image watermark. Click 'Add' button to create the first watermark layer, now you can see the image watermark on the preview window. If you do not want the image watermark to be overlaid on the video all the time, you can easily break away from such problem. Video Watermark Pro lets you to control when the image watermark appears or disappears. For example: the first watermark shows during 1st to 3rd minutes, and the second watermark shows during 3rd to 4th minutes. You can do it with powerful timeline editing function. By clicking “Add Key” button, everything can be accomplished
- 2. well. Note: Video Watermark Pro lets you add more than one image layer to fulfill your demands better. That is to say, you can add several layers and are capable of overlaying different image watermarks on each layer. Step 3 – Click “Run “Button and Start to Add Image to Video Click the big blue “Run” button. You will see another window. You are allowed to select an output folder and then get started by clicking the small “Run” button. The whole watermarking process will be directly showed on this window.